Easy One Pot Prawn Biryani (No Whole Spices) | A Simple and Flavorful Meal
Introduction
Biryani is more than just a dish; it’s a culinary celebration that evokes feelings of warmth, joy, and comfort. With its use of rice and succulent meat, biryani has a way of bringing people together, whether it’s a family gathering, a festive occasion, or a cozy weeknight dinner. However, the traditional preparation of biryani often involves a myriad of whole spices, which can be daunting for many home cooks.
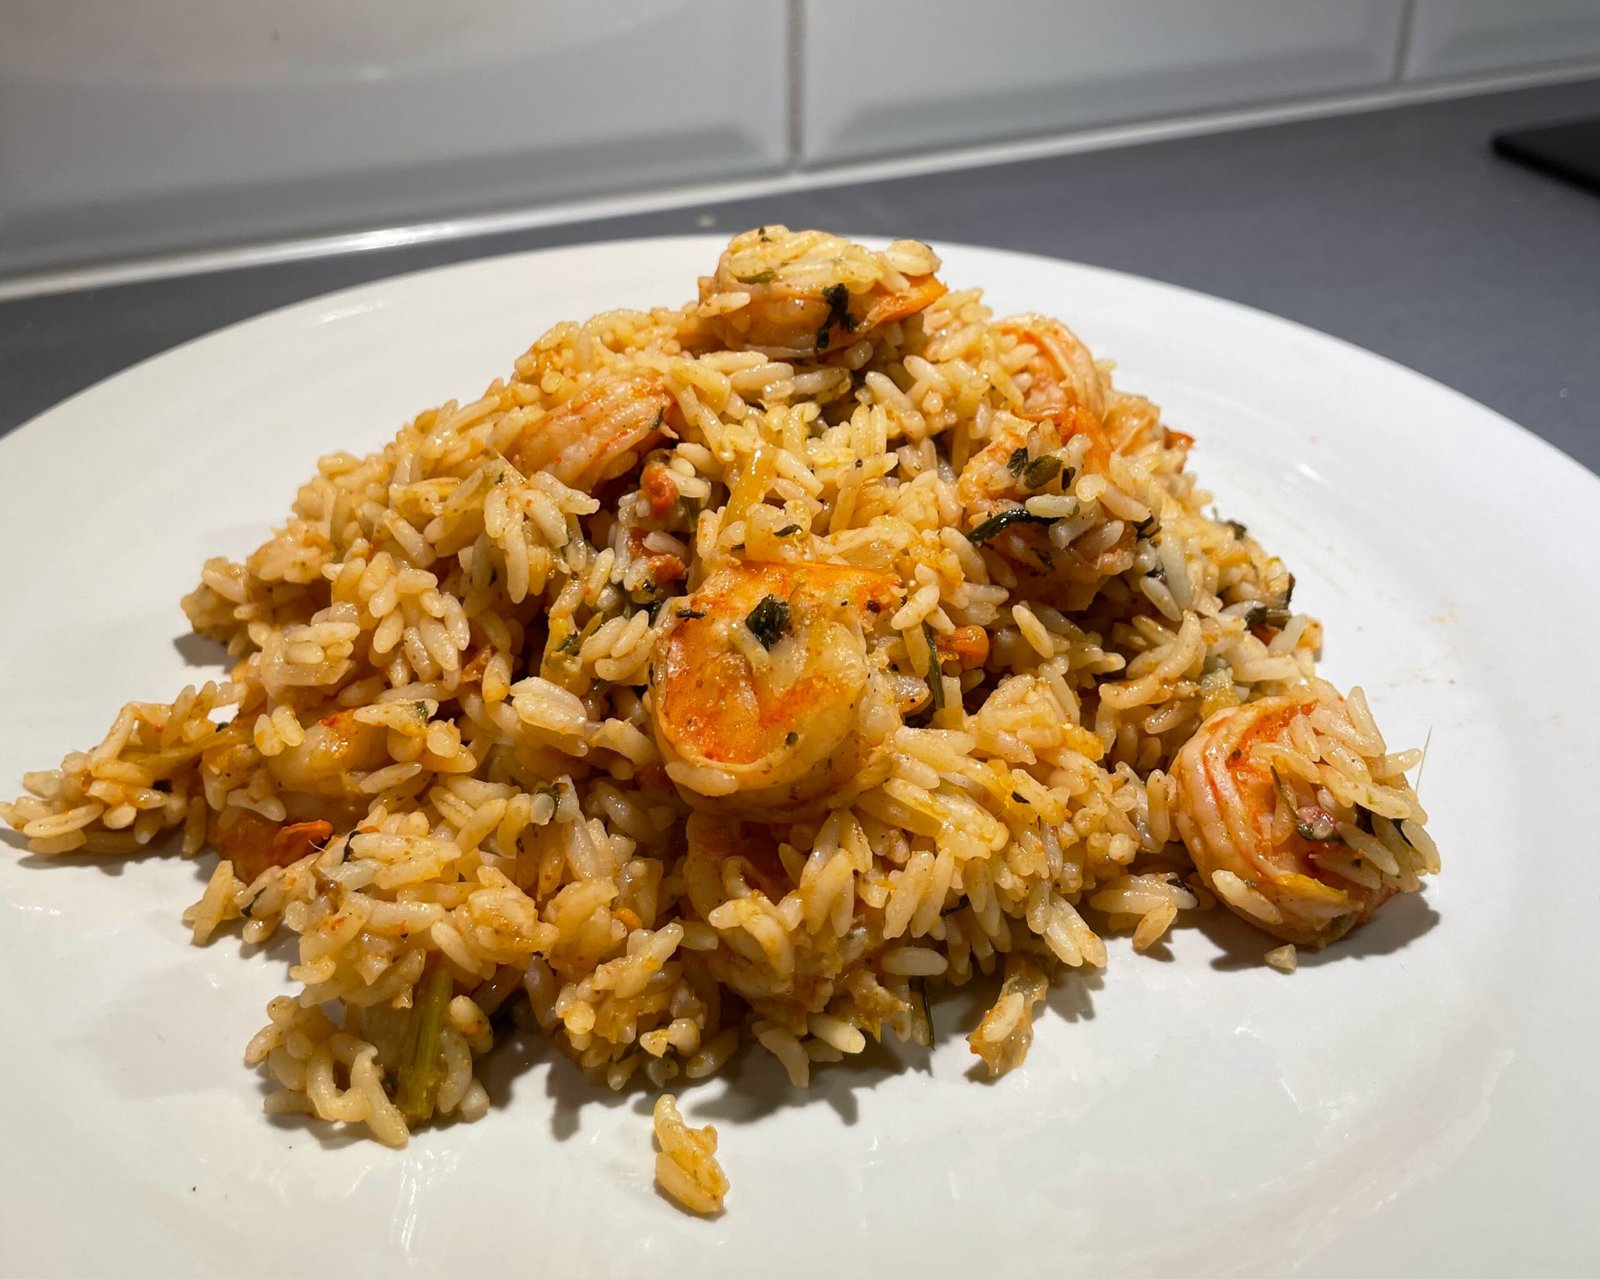
This Easy One Pot Prawn Biryani simplifies that process, offering a straightforward recipe without the complexity of whole spices. After multiple attempts and tweaks, I’ve finally hit the jackpot with this version. Not only does it retain the authentic flavors of biryani, but it also saves time, making it perfect for busy days. The prawns are tender and juicy, the rice is fluffy, and everything comes together in a single pot for maximum convenience.
Why This Recipe Works
The absence of whole spices in this biryani recipe might raise some eyebrows, but it works wonderfully for several reasons:
- Flavor without Complexity: By using ground spices instead of whole spices, the cooking process becomes simpler without sacrificing flavor. Ground spices blend seamlessly into the dish, allowing for a more balanced flavor profile.
- Ease of Preparation: This one-pot method eliminates the need for separate cooking steps, making it an excellent choice for novice cooks or anyone looking for a hassle-free meal.
- Time-Saving: Traditional biryani can be time-consuming due to the need to sauté, steam, and layer. This simplified recipe streamlines the process, allowing you to have a delicious meal on the table in no time.
In some culinary circles, you might hear this dish referred to as pulao rather than biryani. Unlike traditional biryanis where rice and gravy are cooked separately, this version follows an approach used in some South Indian versions. Here, the rice cooks directly with the gravy, much like a pulao, infusing every grain with robust flavors. This method not only simplifies the process but also enhances the dish’s aroma and taste.
Ingredients
For the Marinade:
- 500g large prawns, cleaned and deveined
- 1 cup basmati rice, rinsed and soaked for 30 minutes
- 1 large onion, finely sliced
- 2 medium tomatoes, chopped
- 1 tablespoon ginger-garlic paste
- 1 teaspoon red chili powder (adjust to taste)
- ½ teaspoon turmeric powder
- 1 teaspoon coriander powder
- 1 teaspoon garam masala
- Salt to taste
- 2 tablespoons yogurt
- 2 tablespoons cooking oil
For Cooking:
- 2 cups water
- Fresh coriander leaves, chopped (for garnish)
- Lemon wedges (for serving)
Instructions
Step 1: Marinate the Prawns
In a large mixing bowl, combine the cleaned prawns with ginger-garlic paste, red chili powder, turmeric powder, coriander powder, garam masala, salt, and yogurt. Mix well to coat the prawns evenly and set aside to marinate for at least 15-20 minutes. This marination not only infuses the prawns with flavor but also helps tenderize them.
Step 2: Sauté the Onions
In a heavy-bottomed pot or pressure cooker, heat the cooking oil over medium heat. Add the finely sliced onions and sauté until they turn golden brown. The caramelization of onions adds a deep, sweet flavor to the biryani.
Step 3: Add Tomatoes and Cook
Once the onions are browned, add the chopped tomatoes to the pot. Cook until the tomatoes soften and the oil starts to separate from the mixture. This step is crucial as it builds the base flavor for the biryani.
Step 4: Combine Prawns and Rice
Add the marinated prawns to the pot and stir gently to combine. Cook for about 3-4 minutes until the prawns begin to turn pink. Next, add the soaked and drained basmati rice and stir gently to avoid breaking the grains.
Step 5: Cook the Biryani
Pour in 2 cups of water and adjust the salt to taste. Bring the mixture to a gentle boil, then cover the pot with a tight-fitting lid. If you’re using a pressure cooker, cook for 1 whistle and then turn off the heat. If using a regular pot, reduce the heat to low and let it simmer for about 15-20 minutes until the rice is fully cooked and all the water is absorbed.
Step 6: Fluff and Serve
Once cooked, remove the pot from the heat and let it sit for 5 minutes before opening the lid. Gently fluff the biryani with a fork to separate the rice grains. Garnish with fresh coriander leaves.
Serving Suggestions
Serve this delicious one-pot prawn biryani hot with lemon wedges on the side. The zesty lemon adds a refreshing contrast to the rich flavors. You can enjoy it with a side of raita (yogurt sauce) or a simple cucumber salad for added crunch and freshness. This dish stands well on its own but can be enhanced with these accompaniments for a more complete meal.
Notes
- Customization: Feel free to add vegetables like peas or carrots for added nutrition and color. This not only enhances the visual appeal but also boosts the nutritional value of the biryani. However, this would become more of a pulao than biryani so the choice is up to you.
- Storage: Leftover biryani can be refrigerated for up to 2 days.
This Easy One Pot Prawn Biryani is a delightful dish that captures the essence of comfort food without the fuss. Its vibrant flavors, fragrant aroma, and straightforward preparation make it a must-try for anyone looking to enjoy a restaurant-quality meal at home. Whether you call it biryani or pulao, this recipe is bound to impress your family and friends. Give it a try, and you’ll discover just how simple it can be to create a flavorful, satisfying dish in the comfort of your kitchen!
Perfect for busy weeknights or lazy weekends, this biryani offers a harmonious blend of prawns, spices, and rice, making it a standout meal. With easy preparation and exceptional taste, it’s a must-try for anyone looking to enjoy the essence of Indian cuisine without the fuss. Dive into this quick, comforting dish and savor the convenience and flavor.
Easy One Pot Prawn Biryani
Course: MainCuisine: IndianDifficulty: Easy4
servings10
minutes20
minutes30
minutesIndia is so rich with its plethora of biryanis from all over the country and this is one easy version I made. You need to try this because it has NO whole spices, and is made in one pot which means fewer dishes to wash at the end of the day (hehe). It’s super super easy and extremely comforting
Ingredients
4-5 tbsps of neutral oil
1 large onion
handful of chopped coriander and mint leaves (you can add the coriander stem as well)
3 or 4 green chilies sliced (adjust according to your spice preference)
1.5 tsp of chili powder (the spicier the better)
2 tablespoons of ginger garlic paste (I made this fresh and it’s worth the effort)
1 large tomato chopped
1.5 tsp of garam masala
1/2 tsp of cumin and coriander powder
salt to taste
2 tbsps of yogurt
400-500g of cleaned and deveined prawns
3 cups of rice (washed and soaked)
hot water
lime juice
Directions
- On med heat, saute sliced onions in neutral oil till soft brown
- Add chopped coriander and mint leaves and fry for a minute
- Add sliced chilli and let it cook for a few minutes
- Add the chili powder, ginger, and garlic paste and fry till the raw smell goes away
- Add the chopped tomato and let it cook till mushy and it starts separating from the oil
- Add salt, garam masala, cumin powder and coriander powder
- Once incorporated add the yogurt and let it simmer for a few minutes
- Add the prawns, rice and immediately add the hot water with a dash of lime juice
- Cover and reduce the temp to med-low and let it cook for 10-12 mins or till 95% cooked
- Once the water is almost soaked out, take it off the heat and let it rest covered
Notes
- Ensure at every stage everything is cooked on med heat to get the flavors out
- Add the yogurt once you see the tomatoes are extremely mushy and are separating from the oil
- Soak the rice in water before you start prep
- The water needs to be hot when you add it to the rice and gravy this is important so it starts cooking immediately and doesn’t overcook the prawns
- Add water to the point it just covers everything and cook covered on low-med heat
- Turn off the heat once you see only a bit of the water on the sides left and the rice is 95% cooked and let it sit for 15 mins covered







Leave a Reply